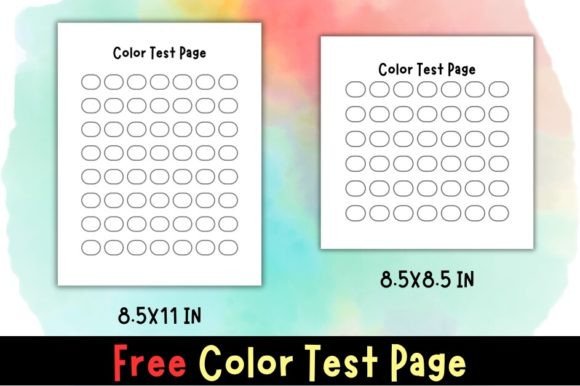
Free Color Test Page: A Simple Tool That Transforms Your Coloring Results
You have a fresh coloring book, a new set of markers, and a whole evening ahead. You pick a page, choose a color, and start filling. Then it happens: the ink bleeds through, the color looks nothing like the cap, or your blend turns muddy. That moment of disappointment is exactly why a Free Color Test Page exists. It is not a throwaway extra. It is the single most practical tool you can add to your coloring routine, whether you are a beginner testing the waters or a professional preparing client work.
This page lets you see how each medium behaves on your specific paper before you commit. It saves time, reduces waste, and helps you make confident choices. But using a color test page effectively requires understanding a few common pitfalls. Let us walk through what actually matters so you get real value from every test you make.
Why Most Coloring Frustration Starts Before the First Stroke
Many people skip the test page because they assume the color on the packaging is accurate. It is not. Marker caps, pencil wrappers, and digital swatches are printed with standard inks that bear little resemblance to how the actual medium behaves on textured or smooth paper. A pale blue marker cap might bleed into a deep navy on certain paper stocks. A watercolor pencil might look faint dry but turn vibrant once activated. The only way to know is to test.
Beyond accuracy, there is the issue of medium interaction. Markers can bleed through thin paper, ruining the page behind. Colored pencils can leave wax bloom that clouds your work. Gel pens can take hours to dry on coated surfaces. A color test page helps you catch these problems early, but only if you test under realistic conditions.
Testing Only One Medium When You Use Several
A frequent oversight is testing only the primary tool and ignoring combinations. If you plan to outline with a fineliner, fill with markers, and add highlights with gel pen, you need to test all three together. Some fineliners smudge when marker ink is applied over them. Certain gel pens lift the marker layer underneath. These interactions are invisible until you put them on paper.
What to do instead: Use your test page to layer exactly what you plan for your final piece. Apply the fineliner first, then marker, then gel pen. Wait a few seconds between layers. This reveals smudging, bleeding, or lifting before it ruins your artwork.
Testing on Different Paper Than Your Coloring Page
It is tempting to test on whatever scrap paper is nearby. That is a waste of effort. A marker behaves completely differently on copy paper, cardstock, and premium coloring book paper. Testing on the wrong surface tells you nothing useful. You might think a marker is safe, only to find it bleeds through your actual page.
A better approach: Test on the same paper you plan to use. If your coloring book has thin pages, test directly on a spare page from that same book or on a printed copy of your test page on identical stock. This gives you reliable information about bleed-through, drying time, and color intensity.
Ignoring Drying Time and Smudge Resistance
Markers and gel pens can look perfectly fine immediately after application, then smudge hours later when you close the book or turn the page. Many people assume their test is complete after ten seconds. True drying time can take several minutes or longer, especially with gel pens on coated paper. Smudge testing should happen after a realistic interval.
Practical advice: On your test page, mark the time you applied each color. Come back after five minutes, fifteen minutes, and an hour. Gently rub a clean finger across the swatch. If it smears, you know to let your finished piece dry longer before stacking or moving it.
Pressure Variation
Colored pencils look dramatically different depending on how hard you press. Light pressure gives a soft, translucent layer. Heavy pressure deposits more wax and creates a solid, glossy finish. Most people test at one pressure level, then wonder why their shading looks inconsistent later.
How to avoid this: Create a small gradient on your test page for each pencil color. Start with light pressure, increase gradually, and note the range. This helps you decide which pressure to use for base layers, shading, and details. It also shows you when the pencil stops laying down more pigment and starts burnishing the paper.
Blending and Layering Order
Blending is not just about which colors you choose. It is about the order in which you apply them. Some coloring mediums respond better to light colors first, others to dark. Watercolor pencils activate differently depending on whether you apply water after each layer or after all layers are down. Without testing, you risk creating mud rather than a smooth gradient.
A better method: On your test page, try two or three layering orders for the same color combination. Note which sequence produces the cleanest blend. Write it directly on the test page so you remember next time. This is especially valuable for skin tones, skies, and foliage where subtle shifts matter.
Overlooking the Test Page as a Reference Tool
Many people use a test page once and discard it. That is a missed opportunity. A well-organized test page becomes a permanent reference for all your coloring projects. It saves you from retesting the same combinations every time you start a new page.
What works well: Keep a binder or folder with your test pages organized by medium, brand, or color family. Label each swatch with the color name and number. Add notes about drying time, bleed-through, and blending performance. Over time, this becomes a personalized color guide that is far more useful than any manufacturer swatch chart.
What to Check Before You Use a Free Color Test Page
Not all test pages are created equal. Before you download and print, consider a few factors that affect how useful the page will be for your specific needs.
Layout and Space
A good test page gives you enough room for multiple swatches, notes, and layering tests. If the boxes are tiny, you cannot realistically evaluate a medium that requires broad strokes, like markers or watercolor. Look for a design that includes large squares or circles, plus space for written observations. Some pages also include gradient strips and blending areas, which are extremely helpful once you get past basic testing.
Tip: Print the test page at a size that matches your typical coloring work. If you color in A4 books, print the test page at A4. Scaling down to fit smaller paper reduces the accuracy of your tests.
Paper Orientation and Margins
Check whether the test page uses standard margins that match your printer. If the design bleeds to the edge, your printer might cut off part of the test area. This is frustrating and wastes paper. Choose a test page with reasonable margins so you get the full benefit of every swatch box.
Reusability and Print Quality
A Free Color Test Page should be easy to print multiple times without losing quality. Some online test pages are low resolution and appear pixelated when printed. That does not affect color testing directly, but it makes the page feel less professional. Look for a clean, high-resolution design that prints crisply. You will likely print it many times as you acquire new mediums or start new projects.
Practical Steps to Get the Most from Your Test Page
Using a test page is not complicated, but a small amount of structure makes the results far more useful. Here is a straightforward process that works for beginners and experienced colorists alike.
Step one: Print several copies of your test page at once. Store them flat so they do not curl. Having extras on hand means you can test new mediums immediately without a separate print run.
Step two: Test one medium family per page. Markers on one page, colored pencils on another, gel pens on a third. This keeps your references clean and prevents confusion about which medium produced which result.
Step three: For each color, apply a small swatch and a larger area. The small swatch shows the base color. The larger area reveals how the medium behaves in broad strokes, including streaking, pooling, or uneven coverage.
Step four: Add a note about the paper type, date, and any relevant conditions like humidity or room temperature. These factors affect drying time and blending behavior. If you test in winter and summer, you might notice differences that matter for your work.
Step five: Keep your test pages visible while you color. Place them next to your workspace so you can glance at them before choosing a color. This habit alone prevents most mismatched color choices and blending mistakes.
How a Simple Test Page Changes Your Coloring Experience
A Color Test Page is not a luxury or an optional extra. It is a practical tool that reduces frustration, saves money on wasted materials, and helps you produce artwork that matches your vision. When you know exactly how each color behaves, you can focus on creativity rather than troubleshooting. You stop second-guessing your choices and start enjoying the process.
The difference between a satisfying coloring session and a disappointing one often comes down to a few minutes of testing. That small investment of time pays off in better results, less waste, and a more confident approach to every page you complete. Whether you are winding down after work, teaching a class, or preparing samples for clients, a test page gives you the information you need to make good decisions.
Download your Free Color Test Page, print a few copies, and start building your personal reference library. The colors you test today will guide every successful piece you create tomorrow.