Wife Mom Boss SVG: What You Need to Know Before Buying or Using This Design File
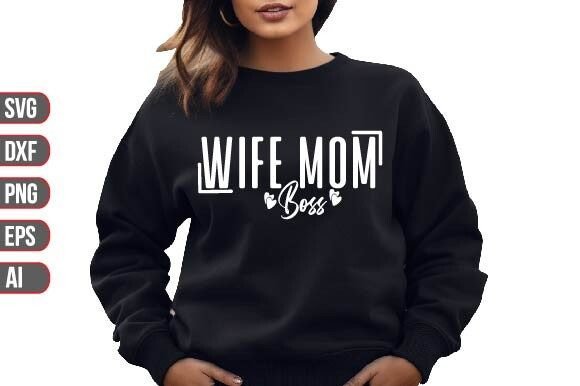
The “Wife Mom Boss” SVG is one of those design files that seems tailor-made for modern crafters, small business owners, and anyone who wants to celebrate the multitasking hero in their life. It’s a popular phrase that resonates with women who juggle family, career, and personal passions—and the SVG format makes it easy to turn that sentiment into a physical product like a shirt, mug, or wall art. When you purchase a quality version of this design, you typically receive a zip file containing five different file formats: SVG, DXF, PNG (300 DPI with a transparent background), EPS, and AI. That sounds straightforward, but I’ve seen plenty of people end up frustrated because they didn’t understand exactly what they were getting or how to use it properly. Let’s walk through the common pitfalls and how to sidestep them.
Not All File Formats Are Created Equal—And That’s a Good Thing
One of the biggest mistakes I see is treating the five files as interchangeable. A beginner might open the PNG in their word processor, try to print it, and wonder why the edges look fuzzy or why the background isn’t transparent. Another might try to upload the DXF into a software that only reads SVG, or vice versa. Each format in that zip has a specific role:
- SVG (Scalable Vector Graphics): Perfect for Cricut, Silhouette, and other cutting machines. It keeps the design crisp and resizable without losing quality.
- DXF: Another vector option, often used in older software or specific CAD‑like programs. Handy for certain cutting setups.
- PNG 300 DPI: A raster image with a transparent background. Great for quick previews, web use, or printing when you don’t need to resize much. However, scaling it up will cause pixelation.
- EPS and AI: Industry‑standard vector formats for Adobe Illustrator and other professional design tools. If you plan to edit colors, layers, or text, these are your best bet.
Practical advice: Before you download, know which software or machine you’ll be using. Cricut Design Space? Grab the SVG. Photoshop? The PNG or EPS will work, but SVG might need a plugin. Cutting a sign with a Silhouette? DXF or SVG. Don’t assume one format fits all.
The “300 DPI” Confusion: Why It Matters Only for the PNG
Many descriptions say “300 DPI resolution” or “every vector resizable 300 DPI.” That’s technically a mix of two concepts. Vector files (SVG, DXF, EPS, AI) don’t have a fixed DPI because they’re based on mathematical paths, not pixels. You can resize them to a billboard without any quality loss. The 300 DPI specification applies to the PNG file only—it’s a high‑resolution raster image that prints beautifully at its original size or smaller.
The mistake: Someone tries to enlarge the PNG significantly, say to make a 24‑inch poster, and gets a blocky, pixelated result. Then they blame the seller for “low quality.” Better approach: Use the PNG for proofs, social media posts, or small prints. For anything large, open the SVG or AI file, resize it in vector software, and export a new high‑resolution PNG at the exact size you need.
Assuming All Vector Files Are Clean and Well‑Constructed
Not every “100% vector” file is created with the same craftsmanship. Some cheap or free SVGs are actually auto‑traced from low‑resolution images, resulting in jagged edges, excessive anchor points, and unpredictable cuts. A quality design like the one described here—Quality work, 100 vector file—should have smooth curves and logical layers. But you don’t know until you open it.
How to check: Once you unzip the file, open the SVG or AI in a free vector program like Inkscape (or Illustrator if you have it). Zoom in on the curves—do they look smooth? Are there hundreds of tiny nodes where a simple curve would do? If the file has been poorly traced, you’ll see jagged segments and extra nodes. A well‑made Wife Mom Boss SVG will have clean, minimal anchor points and separate color layers (for multi‑color cuts or print‑then‑cut).
What to do if it’s bad: If you already purchased and the vector is messy, you can sometimes simplify the path using tools like Inkscape’s “Simplify” or Illustrator’s “Simplify Path.” But it’s far better to choose a seller who provides sample images or a preview showing the vector lines in outline mode. That transparency saves you headaches.
Compatibility Traps: Not All Software Handles SVGs the Same Way
The wording “COMPATIBLE WITH Cricut Silhouette Inkscape Adobe Photoshop Adobe Illustrator” is reassuring, but it hides a few nuance: . Specifically, older versions of Photoshop and some free image editors don’t natively support SVG. If you try to open an SVG in Photoshop CS6, for example, you’ll get a rasterized preview—you lose the vector editing ability. Similarly, some versions of Silhouette Studio require the SVG to be saved in a certain standard to import cleanly.
Practical fix: Always import the SVG into your cutting software using the “Upload” or “Import SVG” function, never by dragging a raster file. For Photoshop users, try opening the EPS or AI instead, or use the PNG for simple compositing. For Inkscape, SVG works natively. And if you’re using a mobile app, check that it supports SVG—many don’t, so the PNG becomes your fallback.
Color Change Confusion: Vectors Make It Easy, But Only If You Know How
One of the selling points of this SVG is “Easy to color change.” And it’s true—vector files let you recolor individual elements with a few clicks. But I’ve seen beginners try to change colors in a raster editor like MS Paint by using the fill bucket, which won’t work on a transparent PNG because it has no defined shapes. The result? The color bleeds or doesn’t fill at all.
Better approach: Open the SVG in a vector editor. In Inkscape, you can select the object and change its fill color. In Cricut Design Space, you can use the “Contour” tool or simply change the color of a layer before cutting. For the PNG, if you need a different color, you’re better off using the colored version provided or editing in Photoshop (but that’s more advanced). The key is to use the right file for the job: vector for color changes, PNG for final output.
The Zip File Extraction Hurdle
It sounds too basic to mention, but I’ve encountered many crafters who download the zip file on their phone or tablet and then try to open the files directly without extracting them. A zip file is a compressed container—most cutting software and design programs can’t read files inside it. You must unzip (extract) the files first. On a computer, right‑click and select “Extract All.” On a mobile device, you may need a file manager app that can handle zip archives.
What can go wrong: A user uploads the entire zip file to Cricut Design Space, sees nothing, and assumes the file is broken. Better habit: After downloading, always unzip the folder to a location you can find (like Desktop or Documents). Then import the individual SVG, DXF, or PNG file. It’s a simple step that prevents almost all “file won’t load” errors.
Overlooking Layering and Multi‑Color Cuts
A well‑made Wife Mom Boss SVG will often have separate layers for the text “Wife,” “Mom,” and “Boss,” maybe with decorative elements. Beginners sometimes try to cut the design as one piece, losing the ability to use different vinyl colors. Or they assume the design is one solid color and are disappointed when it’s not.
What to do instead: Open the SVG in your cutting software and inspect the layers. In Cricut Design Space, click “Ungroup” or look at the layers panel. Separate elements onto different mats for a multi‑color project. If the seller advertises “easy to color change,” test it by selecting an element and changing its color. A quality design will have each word or shape as an independent object. If everything is merged into one path, you won’t be able to separate them easily—that’s a red flag.
Confusing “Resizable” with “Stretchy”
Because vectors are resizable without loss, some users assume they can stretch the design disproportionately—squashing the height or width to fit a particular space. While the quality won’t degrade, the design may get distorted: words become illegible, proportions look off. “Wife Mom Boss” is meant to be read, not stretched into a pancake.
Suggestion: Always resize while maintaining aspect ratio. In most software, hold the Shift key while dragging a corner handle. If you need a specific width, let the height adjust automatically. The design’s original proportions are carefully balanced—trust them.
Checking the File Before Cutting: A Time‑Saver
One mistake that costs money and materials is jumping straight to cutting without a test. You might think the word “Wife” is perfectly centered, but after cutting you realize the offset is off by a quarter inch. Or the vector includes stray lines that you didn’t see on screen.
What to do: Use the preview or simulation feature in your cutting software. Cricut Design Space has a “Make It” preview that shows you where cuts will happen. Silhouette Studio has a similar cut preview. If something looks odd, go back to the SVG and delete or adjust that element. A quick test cut on cardstock or vinyl scraps saves you from ruining your final material.
Putting It All Together: A Smarter Workflow
Instead of treating the downloaded zip as a one‑click solution, take a few minutes to organize your files. Unzip, then create a folder with the design name. Open the SVG in Inkscape (free) to verify quality and colors. If you need a different color, change it there, then save a copy. Import the cleaned SVG into your cutting software. Use the PNG for previews or quick prints. Keep the AI and EPS untouched as source files for future edits in Illustrator.
This approach eliminates nearly every mistake I’ve listed. You’ll save time, reduce frustration, and get the crisp, professional result you were expecting when you saw “Wife Mom Boss SVG.” The design itself is a fantastic asset—just give it the right tools and a little understanding, and it will serve you well for many projects.